Viewing entries in
Cultured Foods

Comment

Almond Yogurt With Fruit - OMG!

The dairy free yogurts are getting yummy. I love the almond yogurt and the coconut yogurt available now in most natural food stores. The biggest challenge is to find them "PLAIN" with no sugar added. What works for me is to use my own sweetener if needed at all. The best I have found so far is the "Coconut Nectar" Amber by Big Tree Farms. One teaspoon on anything and you can transform an already awesome dish. 

Shown Here:

Almond Yogurt

Strawberries, blueberries, banana and lilikoi (Passion Fruit)

1 tsp Coconut Nectar

This awesome dish is so rich, delicious and satiating! I am going to make my own Mac Nut yogurt since it is local. Then everything but the blue berries will be local. Stay tuned!!

Comment

Comment

Cranberry Cultured Veggies

Cranberry Cultured Veggies

Ingredients

4 cabbages (about 30 cups)

4 cups onions

1 cup grated ginger

1 cup chopped and seeded jalapeno

½ cup chopped mint leaves

2 tbsp. cinnamon

¼ cup salt (or salt to taste)


Cranberry Sauce

Ingredients

4 cups fresh cranberry

1-cup sugar

1 ¼ cup water

Rind of one orange

4-5 drops of doTerra Essential Oil – Wild Orange (optional)

(optional: chunk of ginger)

Directions: Cranberry Sauce

Put all ingredients in a saucepan and bring to a boil. Turn down the heat and let the mixture simmer for 10 minutes. Remove from the heat and let cool.  You can also use raw cranberries, and a smaller amount of sugar in the cultured veggie mixture. I use cooked cranberry sauce because the finished fermentation is slightly sweeter, which is a yummy way to serve it with a traditional thanksgiving dinner.  It also ferments within about 5 days.


Directions for Cultured Veggies

Wash outer leaves of cabbages and save the outer leaves to build a canopy later for harvest (see below).

Wash and process all of the ingredients and combine into a fermentation jar, glass bowl or bucket.

Place the outer leaves from the canopy on top of the mixture. Make sure the mixture is completely covered. Then place a plate on top and a rock or weight. If you are using a rock, make sure you boil it first for about 6 minutes. Cover mixture with a lid or cloth and let site for several days.  If you want some great visual instructions on how to make cultured veggies, check out my course on “Cultured Veggies” HERE. You can view it online instantly.

When the fermentation is complete, place the veggies in jars, secure lids, and refrigerate.


Comment

2 Comments

The Most Delicious Electrolyte Drink

Help! For a over a year now I have had a challenge with getting leg and foot cramps at night when I am trying to sleep. It is so annoying. I have asked everyone I know what to do about the demon that destroys my sleep. Answers have come back like: take more magnesium, calcium, potassium, electrolytes, minerals, blah blah blah.


In all honesty I think I have tried everything. The drawback is that if I take too much magnesium, enough to alleviate the midnight demon, then I get, you know what - the runs. I have tried spray on mag, Calm, calcium-potassium-magnesium combo’s, sacred clay, and more.


One day, a couple weeks ago I decided to find the answer. Some said I was dehydrated and should douse my water with minerals. Tried that. You see, enough mag and minerals to stop the demon, but too much for the bowels. I know this is not a pretty picture, but I am finding out this is a problem for a bunch of folks, especially us older guys and gals.


OK, so the vicious cycle goes on, lots of mag – no cramps, then the runs and dehydration, then cramps again.


One day while visiting my doc for a little check up, he says that most people in Hawaii, me included, are dehydrated. Fine, I think, and begin to confess my story. He says to drink more water.


Then the magic happened during a conversation with my sister. She says to try Blackstrap Molasses. Yes, that resonates with me! I am stoked. I have found the answer. I am sure of it. Ooops. A problem. Blackstrap Molasses loosen the bowels.


That very night I get a call from a friend who is a naturopathic doctor. She sends me a recipe for an electrolyte drink. Then I finally dove into Google. Now, why oh why, did I not go there yet? The creation began.


The next day, with bottles arranged on the counter and a Vita Mix full of fresh spring water, I created my own electrolyte drink full of minerals and other yummy things. My body is getting back into balance. I still get the demon now and then but they are lighter and short lived. Everything seems to improving.

The best part is that I love this drink. It is so much better than slugging down water all day that just seems to go through me. That never did seem quite right to me.  


Here is my recipe developed from lots of research and my palate! What a great way to "Make Every Bite Count".


Chef Teton’s Electrolyte Recipe


Water           About ½ gallon

1-2 tsp          Celtic Sea Salt

2 tbsp           Apple Cider Vinegar

1 tsp              Baking Soda

1 tbsp           Raw Honey

2 tbsp           Blackstrap Molasses


Optional: Juice of an orange


Blend all “organic” ingredients together and then transfer the liquid to a container to chill or not, go or stay. I divide mine up into 2 smaller bottles. Then I have one to take with me if I go out.  I like it warm and also chilled.  It has replaced that urge to drink something during the day that might be less than excellent.


If it tastes too strong, then cut back on the molasses and vinegar.


If you are sugar sensitive and desire a sweetener, stevia is a good option. I am not a big fan of stevia, but it goes well with sour/tart flavors such as vinegar. The key is to use just a little. Most people use too much and then it takes yukky.


The molasses adds a nice robust sweetener to it as well.


So, this is my drink for the day and at night I have about 1 cup of warm water with 2 tbsp of Apple Cider Vinegar. Sometimes I include a little honey. Make sure you get raw and unpasteurized (with the Mother is best).


Enjoy! And let me know how it works for you.


Do you want to know more about the magic of molasses and vinegar?


Read below:


Blackstrap Molasses (unsulfured)


Great for your hair - One serving (two tablespoons) of blackstrap contains approximately 14 percent of our RDI of copper, an important trace mineral that helps rebuild the skin structure that supports healthy hair.


Safe sweetener for diabetics - Blackstrap molasses has a low glycemic load, so sipping all day works perfect. This is also good for a sugar substitute for people who are need to avoid blood sugar spikes. There is no fat in a serving and only 32 calories, making it good for weight loss.

Laxative qualities - Blackstrap is a natural stool softener that can improve the regularity and quality of bowel movements.

Rich in iron - Two tablespoons of blackstrap contain 13.2 percent of our RDI of iron, which is needed to carry oxygen to our blood cells. Individuals who are anemic often benefit from consuming 1-2 tablespoons a day.

High in calcium and magnesium - Blackstrap molasses contains a mineral profile that results in superior absorption. The calcium-magnesium ratio is balanced. Since our bodies need large quantities of magnesium to help absorb similarly large quantities of calcium this makes it a great supplement for calcium. Both minerals aid the growth of bones, making blackstrap a great option for osteoporosis and other bone diseases.

Additional mineral content - Two tablespoons of blackstrap molasses contains 18 percent of the RDI of manganese (which helps produce energy from proteins and carbohydrates), 9.7 percent of our RDI of potassium (which plays an vital role in nerves and muscles), 5 percent of the RDI of vitamin B6 (which aids brain and skin) and 3.4 percent of our RDI of selenium. 


See what a great food this is!


Apple Cider Vinegar


The benefits of Apple Cider Vinegar are so numerous, and it was the #1 cure reported on Google for the demon leg craps. People swear by taking a couple tablespoons in warm water when cramps arose. They reported instantaneous results. Here is a brief list of some of the benefits.


Acid Reflux

Heart Health

Diabetes

Weight Loss

Sinus Congestion

Sore Throat

Digestion

Skins, Warts

Energy

Fruit and Veggie Wash


Put Organic Apple Cider Vinegar in your diet for just great balance in your blood sugar, alkalinity, digestion and overall balance. The stuff is great for your hair too.

2 Comments

1 Comment

Cultured/Fermented Vegetables Appetizer

This is one of the best appetizers you can serve yourself and your guests. Recently I was a guest chef at a huge fundraising event. All that was being served was appetizers from 6 different chefs on Maui. Most of the food was donated by local farms. Lucky me, received copious amounts of cabbage, beets, carrots, onions, and kale from Oprah's farm. Without one bit of hesitation I whipped up a 5 gallon batch of these incredible vegetables grown in rich organic soil, added some spices and let them brew for 2 weeks. The result? Well, you can see from this picture that the beets created a beautiful red/scarlet color to this rich and tasty appetizer.

I served them on a small nori sheet topped with a gluten free rice cracker. The good news is that people loved the fresh succulent bite they received. It was the perfect antidote to some of the other greasy stuff being served. This could be a good thing for you to try just before a meal to set up your taste buds and your digestive system, and/or a good way to start your day. Below are the ingredients to the recipe I used for this batch. The measurements are not included because I did not keep track of them. Basically, when making your own veggies, make it taste like you would like to eat it. It will change as it ferments only by getting better. Be brave and experiment!

Cabbage (1/3 of your base should be cabbage). I used basic green cabbage and also napa cabbage. Because of the water content of the napa cabbage, the mixture was more watery than usual,  which was great because it was juicy instead of dry. By using the food processor, the texture was also small, like a relish.

Ingredients

Onions, beets, carrots, kale, ginger (in order of volume). I also added about 10 jalapeno's without the seeds. I used 2 cups of ginger in 5 gallons, which resulted in a bit of heat for the mixture.

Spices: salt, chili powder, sea kelp (about 1/3 cup).

Do it! Mix your favorite veggies together and create magic. If you want to learn more about making cultured veggies, beet kvass, fermented millet and more, take a look at my course on "Cultured Superfoods". Enjoy.

Photo by: Barry Frankel (http://islandfreshphotography.com/)

1 Comment

1 Comment

Making Whey for Beet Kvass

If you are not drinking fresh Beet Kvass you are missing out on one of life's biggest pleasures. I have already posted Beet Kvass instructions and created an online course for making it and other cultured foods, but I have found a new way that works better than any for me - ferments nicely and taste great.

Now I make it with organic whey made from organic yogurt (alive with friendly flora). Before I tried whey from a local goat dairy (organic, of course). It was good, but a little gamey (is that a word?) tasting. It is also not that easy to come by organic goat whey.

I also tried making it with a kefir starter and/or probiotic granules or powder. That was not the best either, but OK. First of all, one starter packet made only a quart, and secondly the next batch came out weak. This is a very expensive way to make it, and I really did not get the benefits and rich flavor I wanted.

Now, you can also make it with fermented juice from cultured veggies. This is a good method too, but I like the flavor much better with the yogurt whey.

Here is how it is done. First, you need a Greek Yogurt Maker. Get it here on Amazon. Then use your favorite plain whole milk yogurt. Make sure it has living probiotic cultures in it. Empty about half a jar of the yogurt into the yogurt maker as shown below. Spread it out evenly. Place the lid on tight and place the yogurt maker in the fridge. Whey will begin to separate instantly from the yogurt as you can see below in the picture. Within a few hours or overnight most of the whey will have seeped through the mesh lining of the yogurt maker.

I have found that half of a quart jar of yogurt yields a little over 1/2 cup of whey from the yogurt shown below. I use about 1/2 cup of whey for a whole gallon of Beet Kvass. If you are only making a quart or 1/2 gallon, adjust accordingly. Add salt to taste and ginger, lemongrass or any other yummy flavors you might like to infuse. My favorite is just whey, salt and ginger.  Learn more about the online course for making Cultured Superfoods HERE!

Whey seeping through the mesh instantly.

One of the bonus's of making whey this way is the Greek yogurt  that now resides in the top of the yogurt maker. It is so creamy you will want it for dessert. Seriously, it is delicious - great topped on fruit, or a potato, taco or anything at all. I love it with a little honey or nothing at all - so rich and creamy with a sour flavor. Love it!!!

Yogurt going into the yogurt maker.
Yogurt and Greek Yogurt Maker.

1 Comment

Comment

Probiotic Rich Smoothie with Beet Kvass

Now I know this looks slam dunk delicious. The good news is that it is! Plus it is excellent for your body nourishing it with probiotic richness.

Hoping that you make Beet Kvass, follow the recipe below or make up your own:

Ingredients for a Beet Kvass Smoothie:

1/2 cup Beet Kvass

1 banana (frozen or not)

A good squeeze of lime juice

1 cup or more of  frozen berries

Add water for desired consistency

Optional: 1 tablespoon of Barlean's Flax or Coconut Oil! Blend and serve.

You must make this incredibly delicious blood cleanser and purifier.  It is very easy. Click HERE for the recipe, or better yet, check out my course on Cultured Superfoods and learn how to make cultured/fermented veggies, Beet Kvass, Ogi (fermented millet), yogurt and kefir. YUM!

Put these delicious probiotic rich foods into your daily diet. Eating them is the best thing you can do for your digestion and your glow. You will be glad you did!

Comment

2 Comments

Dr. Shade Speaks on the Power of Cultured Vegetables!

Dr. Christopher Shade spoke at the Body & Soil Conference here on Maui in the summer of 2013. He delivered 3 riveting lectures about the miraculous effects of detoxing heavy metals, particularly mercury, from the body. What was so powerful to me was the profound healing people experienced when ridding themselves of these troublesome metals. Mercury creates havoc in the body that is often undiagnosed, or diagnosed mistakenly as something else. His stories of transformation were miraculous to say the least.

During the conference I launched my Cultured SuperFoods line of cultured veggies. I also made Beet Kvass for the attendees. Dr. Shade was my best customer. At the end of the conference he held up my products and said that everyone should be buying cases of these foods.

Learn to make your own now with my new course "Cultured Veggies & Other Fermented Foods"

If you think you have heavy metals and mercury in your body (which you probably do if you have had dental amalgams or love tuna), I highly recommend that you put cruciferous veggies in your life. Even better use cabbage, cauliflower and other superfoods to create cultured veggies full of living enzymes and probiotic bacteria.

Now you can make your own veggies, Beet Kvass and other probiotic rich foods, with my course "How to Make Cultured SuperFoods". These foods are easy to make, affordable and a delicious way to obtain such powerful nutrients. Check out more info and promo clips HERE.

You can contact Dr. Shade at: Quick Silver Scientific on the web. His detox method is simple, affordable and effective.

2 Comments

2 Comments

Cultured/Fermented Veggies - A Mess Worth Making

Every time you see a cooking show, it looks perfect, right? My kitchen never looks that perfect. As a matter of fact, when I make cultured veggies, we make the hugest mess ever. There are bits of veggies everywhere and every bowl, strainer, measuring cup, knife, cutting board is used, particularly if we are using many different varieties of veggies.

So, I recommend getting the kitchen ready for the production. Here are a few tips to get you started on your own journey of messing up your kitchen royally!

1. Clear your counter tops of any unnecessary items to create plenty of counter space.

2. Clean counter tops with hot soapy water and/or some sort of natural disinfectant (I sometimes use rubbing alcohol) to make sure that everything is sparkly clean and sanitized.

3. Assemble equipment: cutting boards, knives, food processor, grater, bowls, strainers, measuring cups, gloves and fermentation jars, bowls or crocks.

4. Wash all the veggies and put them into strainers to drain.

5. Set up a station for the production flow of cutting boards, food processor and bowls to receive the processed veggies.

6. Creating a flowing order helps to maximize ease and efficiency.

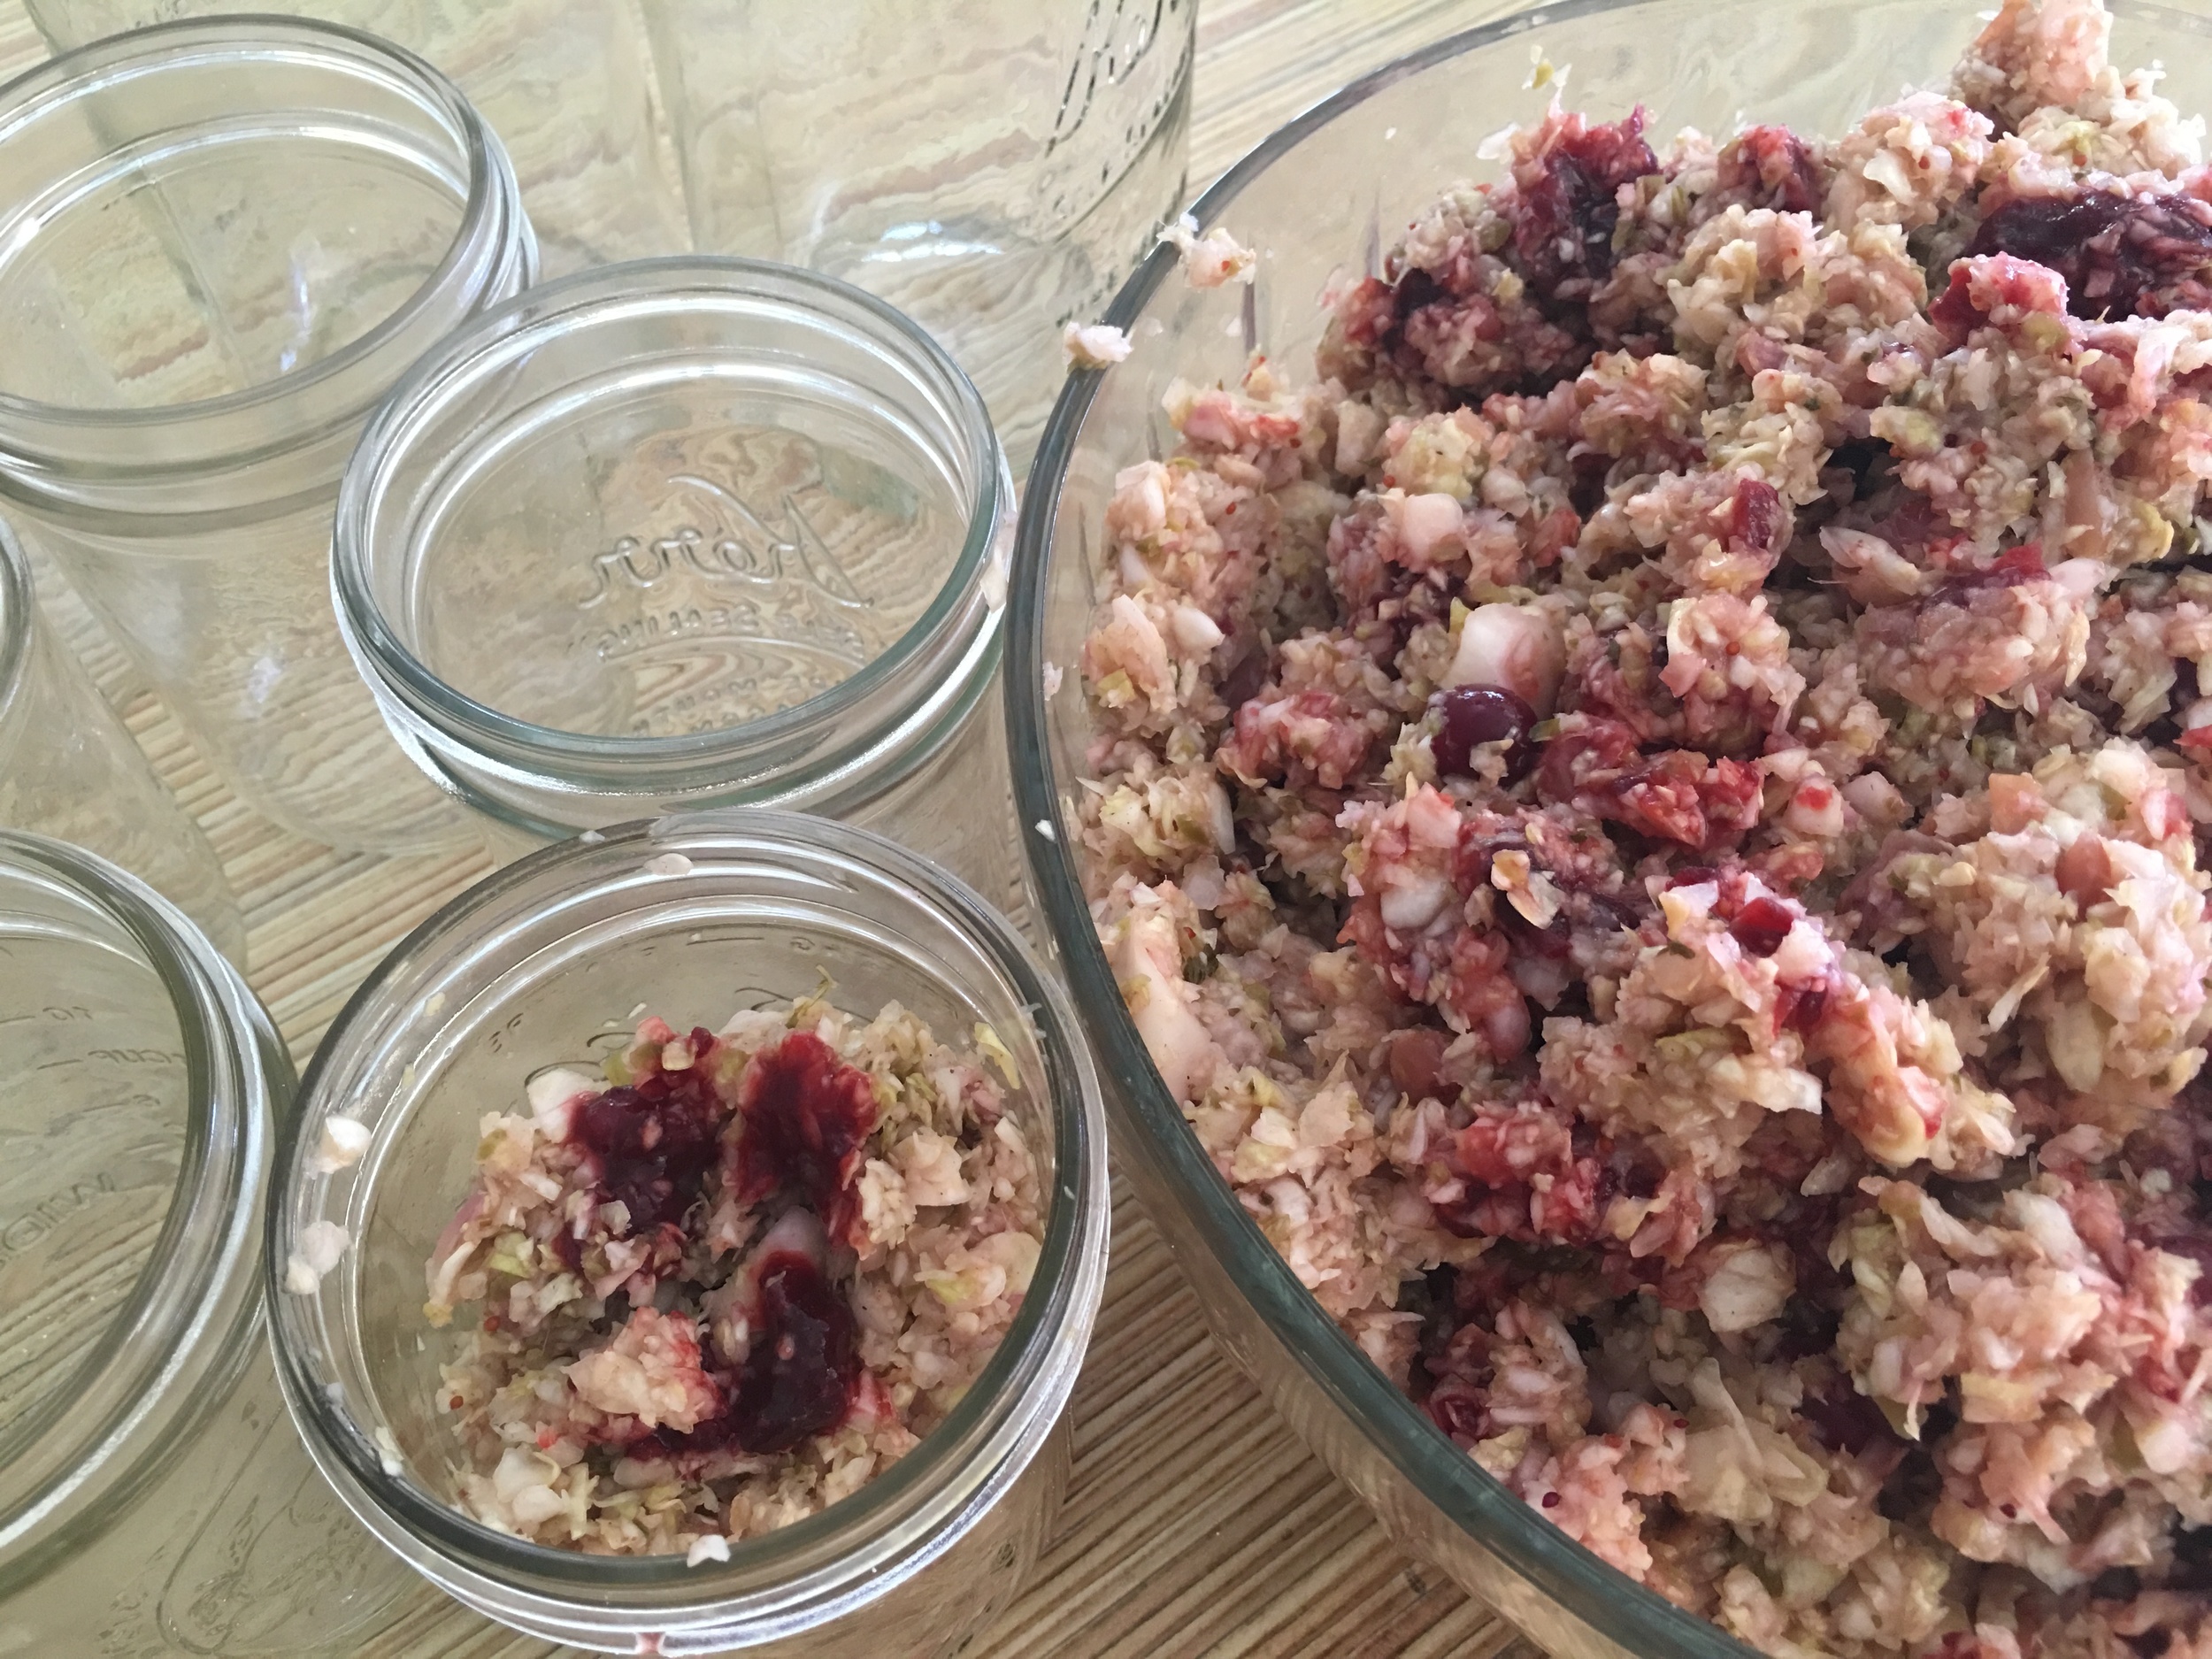
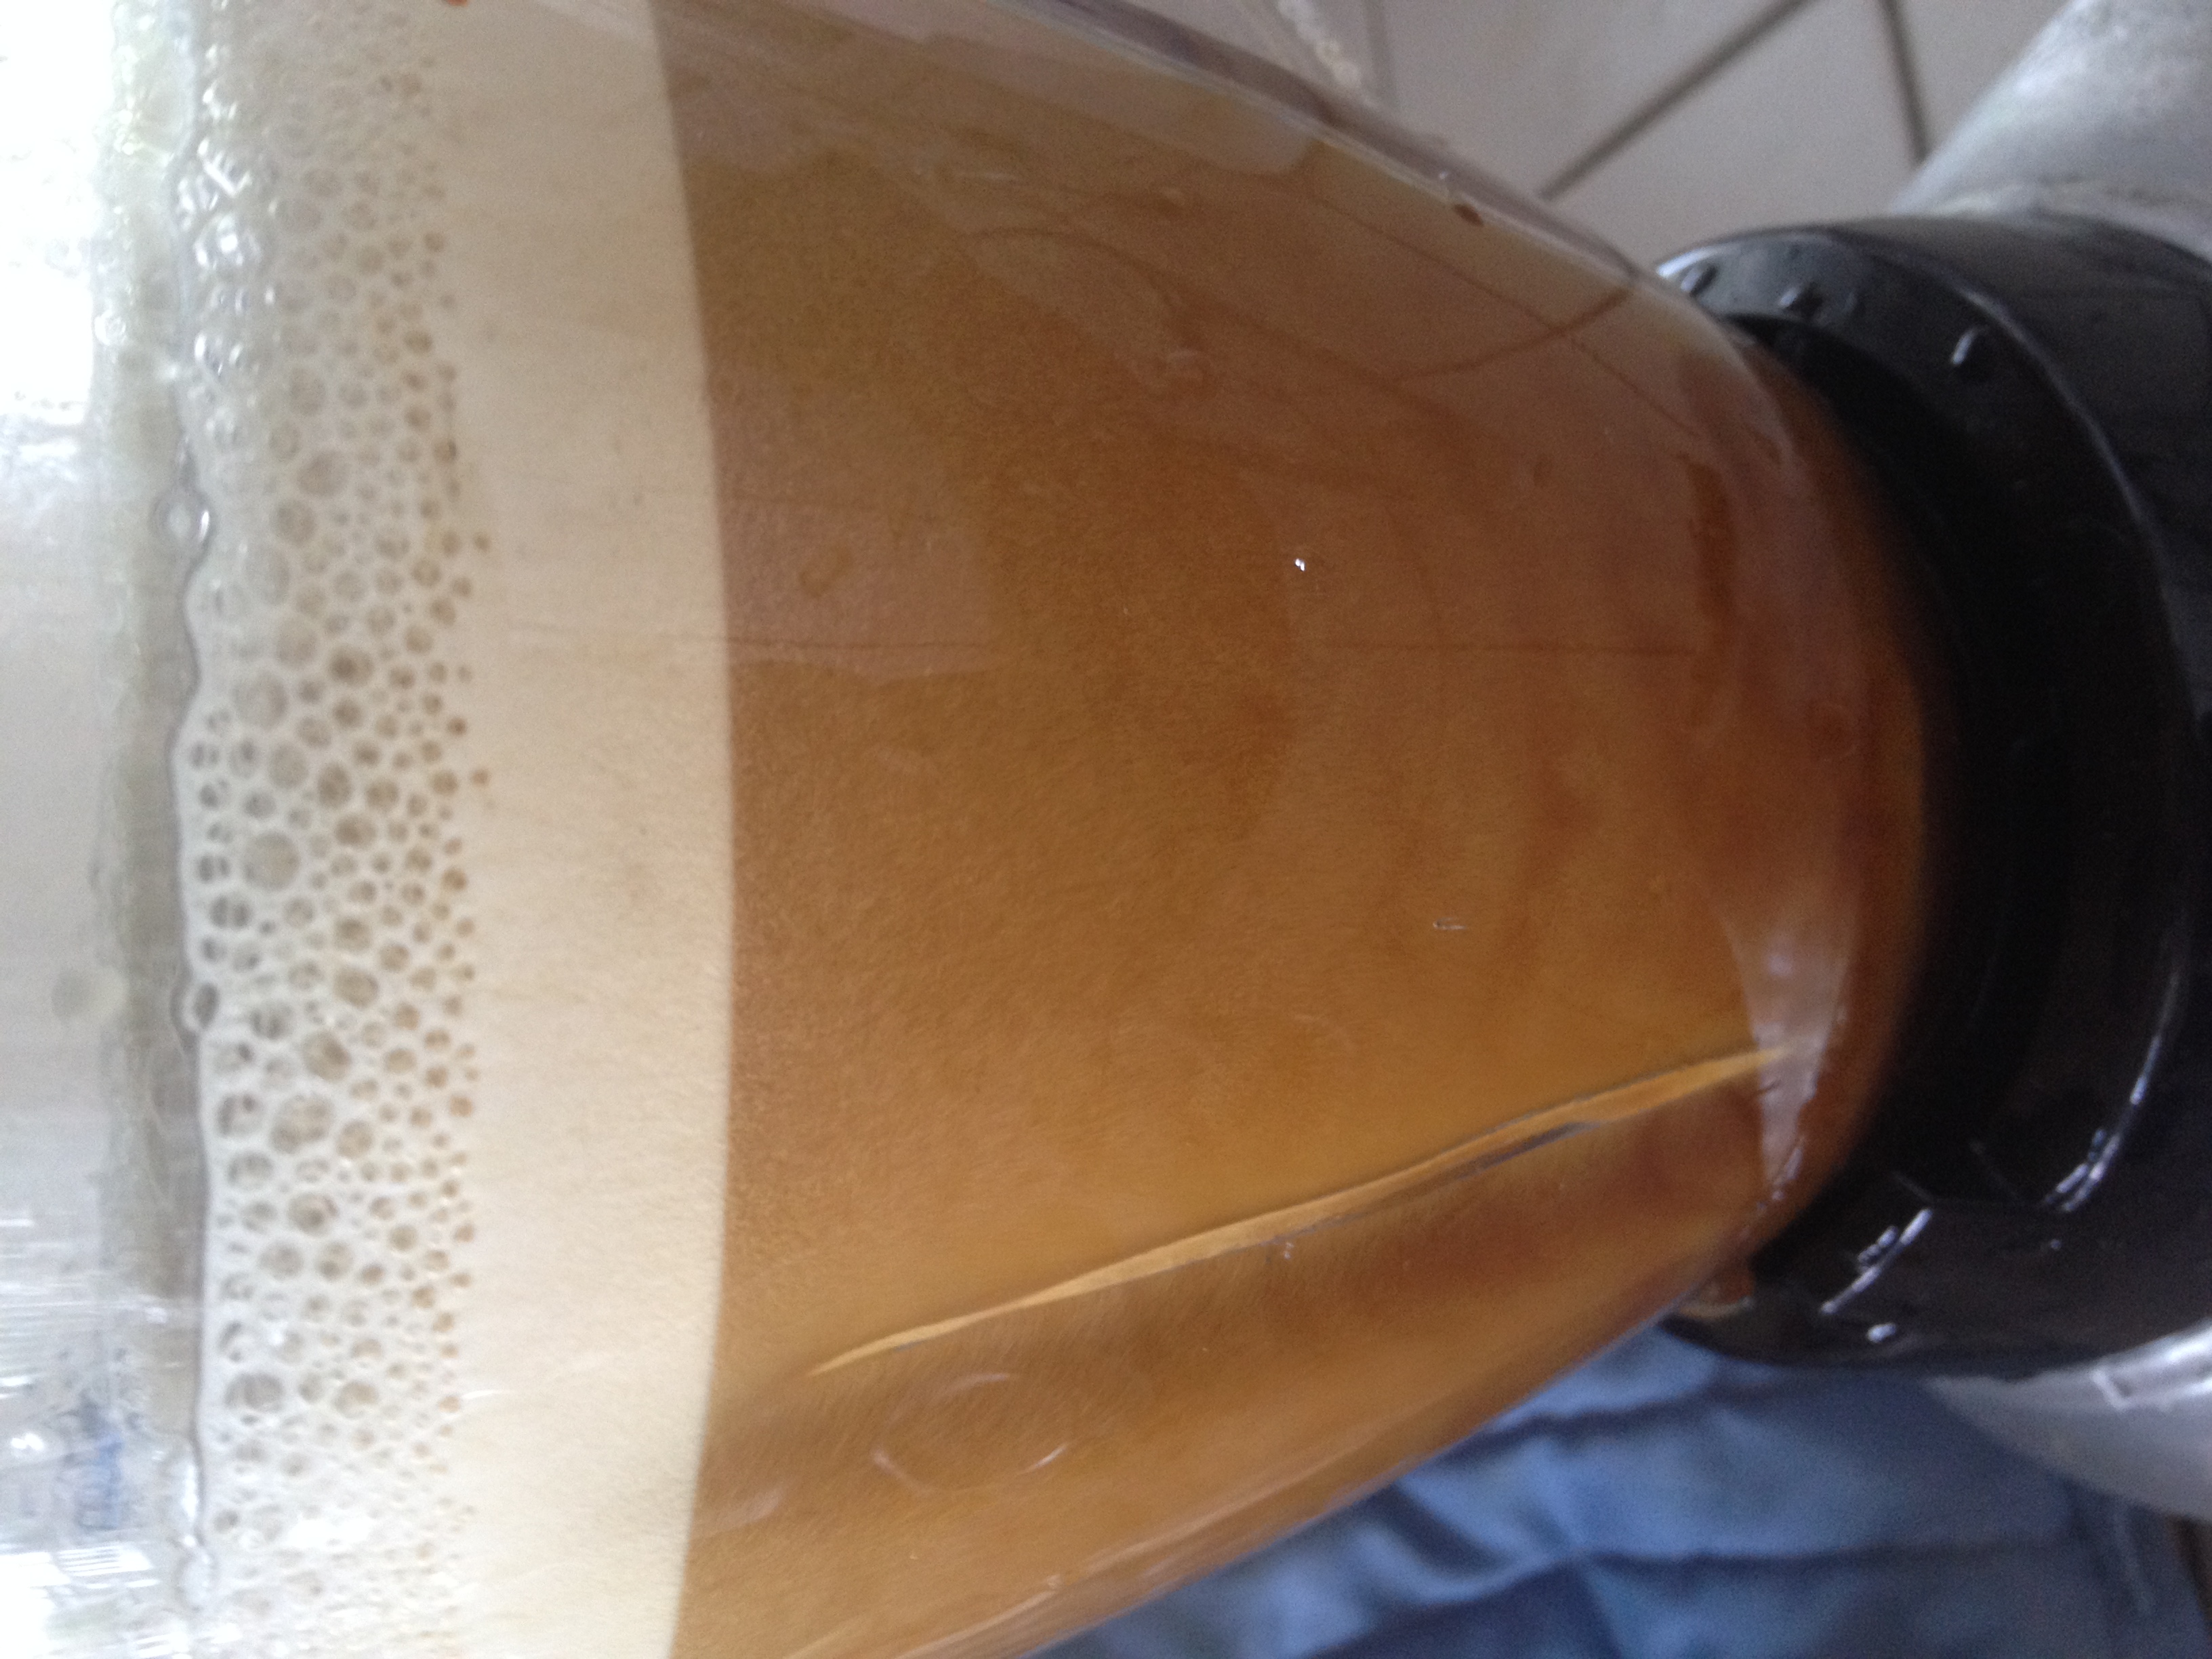
7. Here is what my flow looks like: After washing I cut my veggies into about 1-2 inch chunks as they process more easily that way. Once processed, I place each variety into its own bowl. Then I measure them as I add them to my large bowl to mix them together. I write the measurements down so that I can track the batches and thus discover what veggies deliver what kind of flavor. When working with jalapenos, I wear gloves while I remove the seeds and while mixing the entire mixture together. This alleviates any burning sensation of the hands, which can be brutal for a long period of time if you handle the seeds in any way. Once the entire mixture is blended, I add the sea veggies, salt and sugar and any other spices. A strong flavor will deliver a delicious veggie mixture.

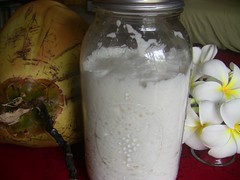
8. Place veggie mixture into your choice of fermentation container. My favorite vessel is with a very large glass container (like a crock) or food grade bucket, both with lids. I am not a huge fan of fermentation crocks. I like to see the veggies, and I am not crazy about the shape of the crocks in how they narrow at the top.  They do work great though.

9. If you are using glass then make sure you cover the veggies so they are not exposed to light. You can them with a towel.

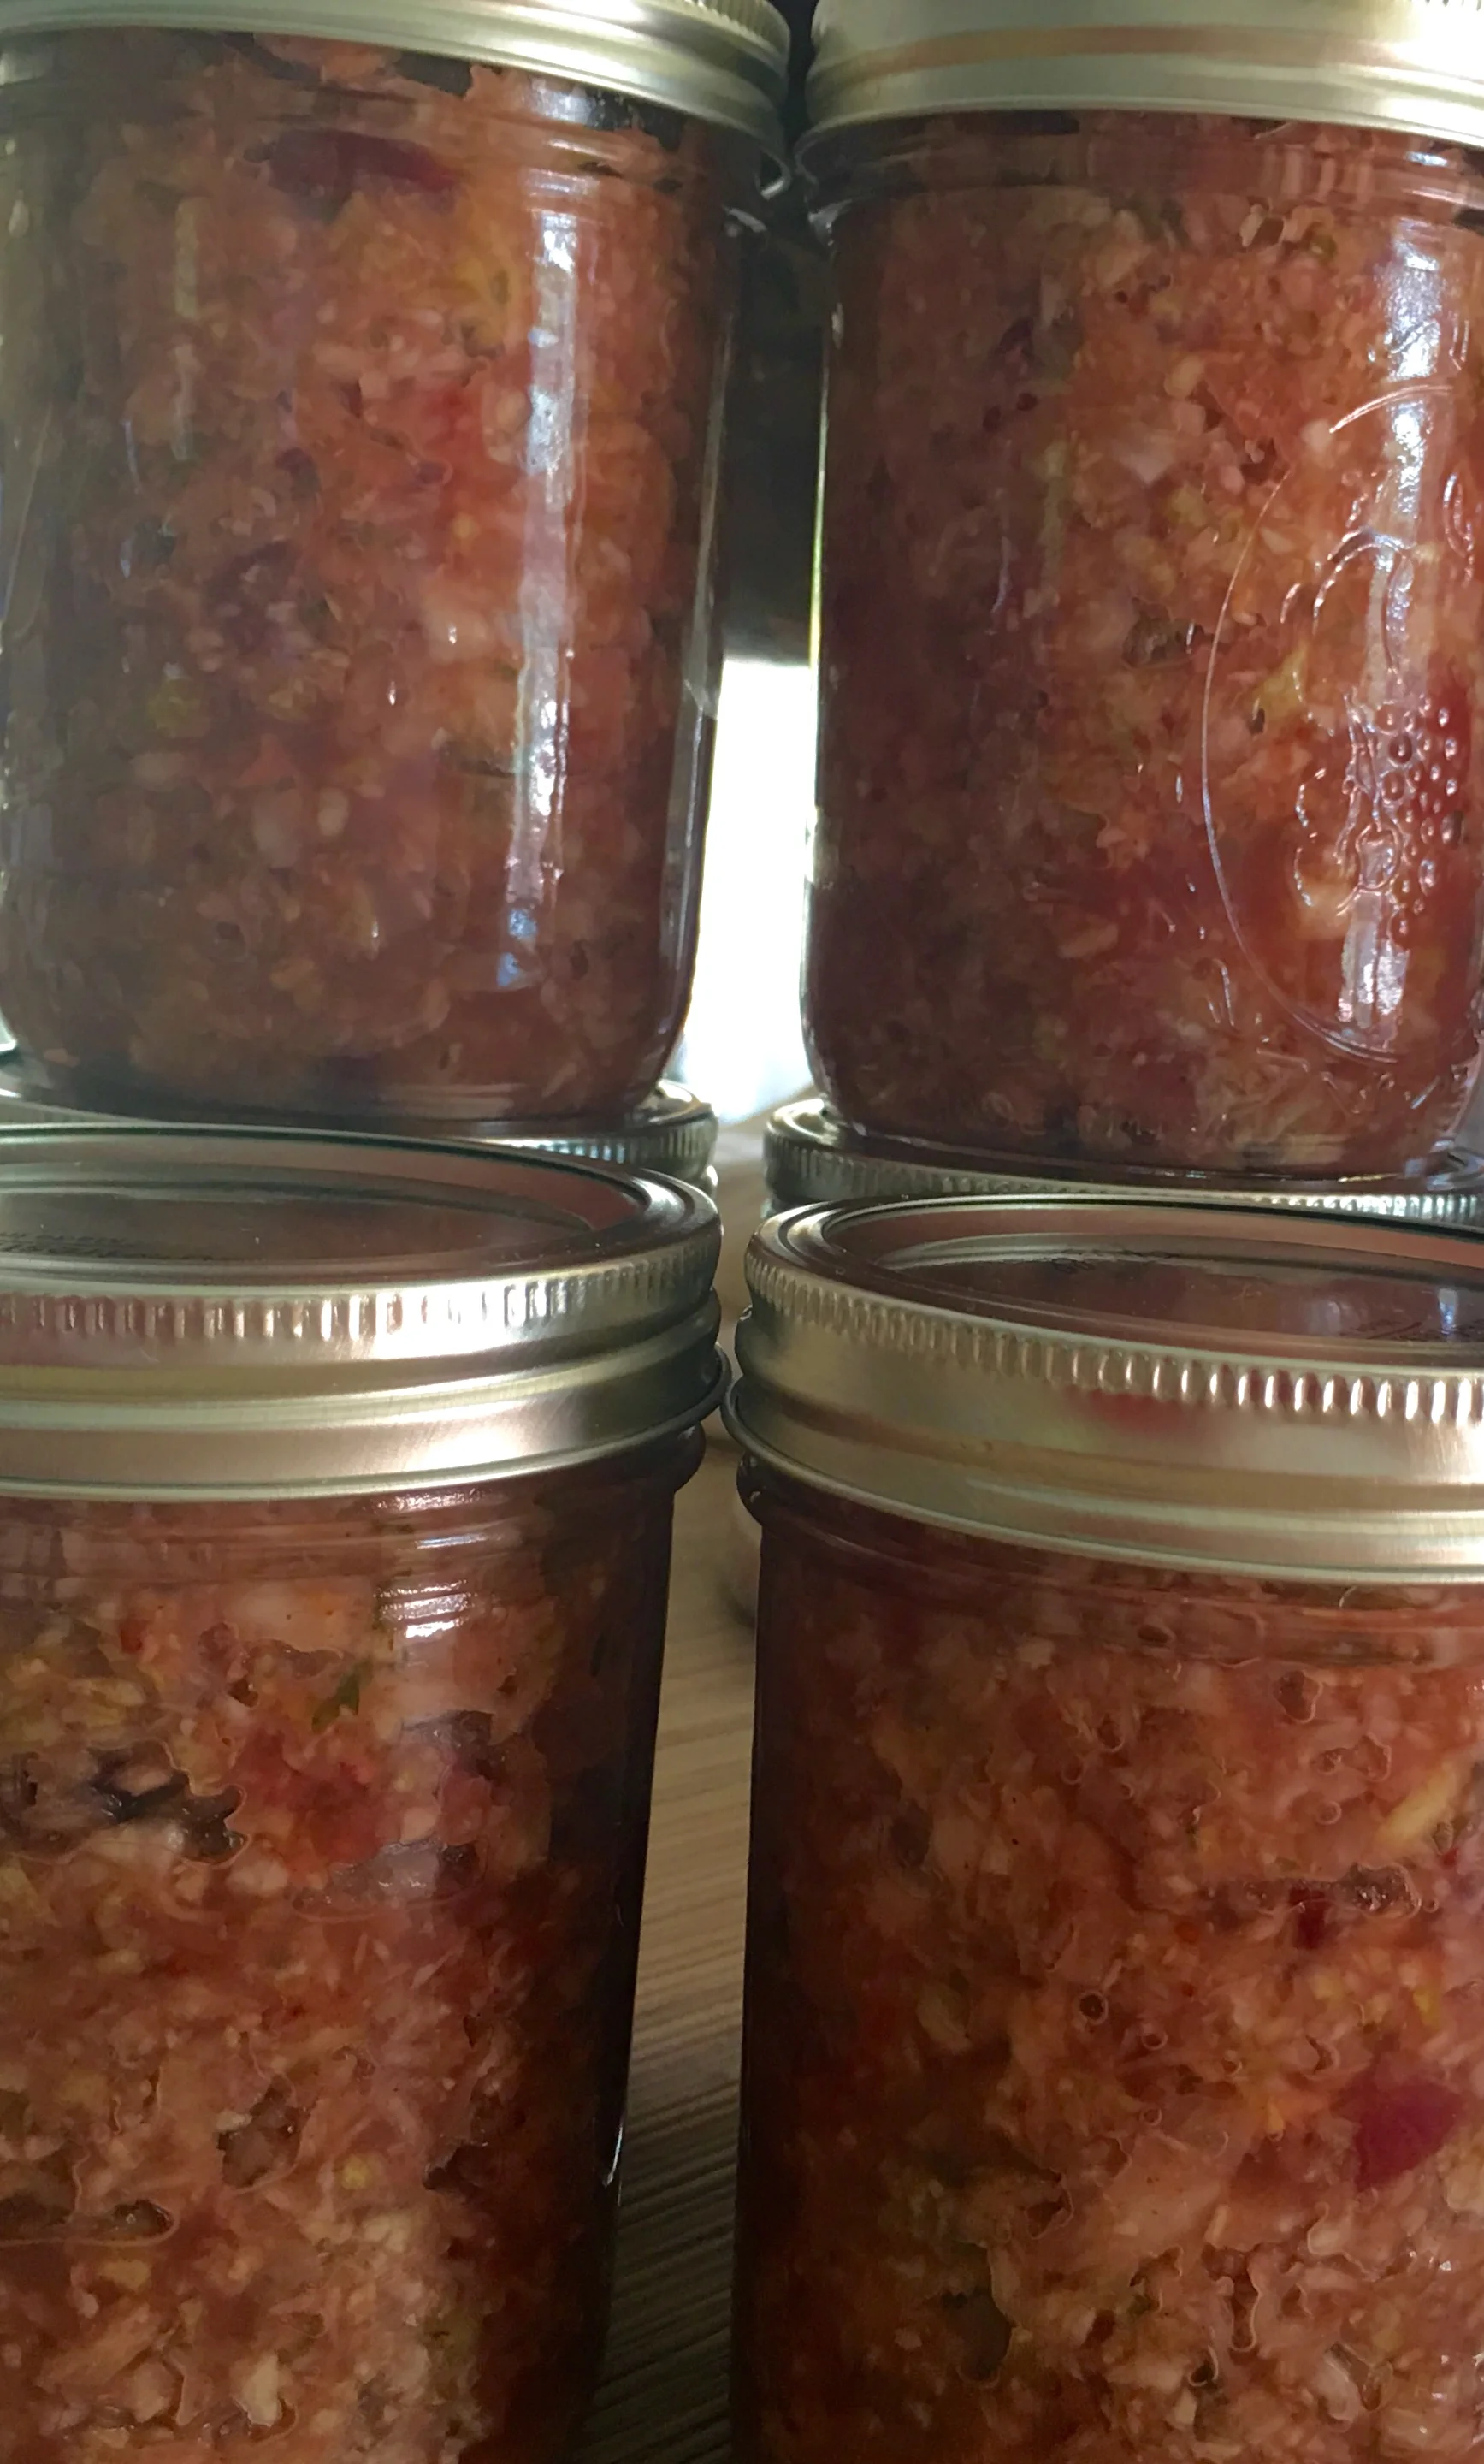
10. Once your veggies are tucked away neatly to ferment, store them somewhere fairly cool and out of the light. Let them ferment for a minimum of 3 days. My veggies sit for 10 days to 2 weeks. Yum.

11. Now you get to clean up your mess if you have not already started!

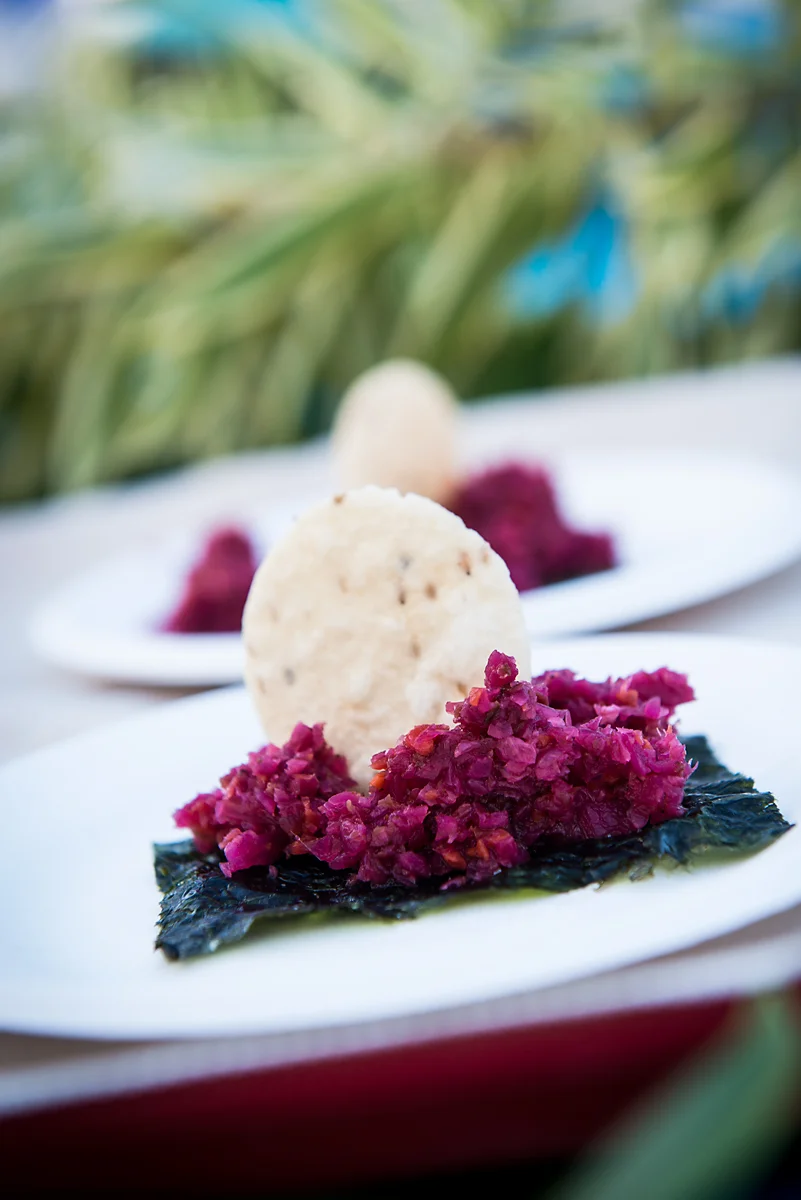
12. When you are ready to harvest the veggies, remove the canopy and store them into large jars or glass containers and refrigerate. They get better as they continue to ferment even while refrigerated.

Now, go for it! Learn to make them with my new on line course: How to Make Cultured SuperFoods - More Info Here!

Got any questions?

Leave a comment below and let us know how you are doing.

2 Comments

4 Comments

Fermented Cranberry Veggie Delight

I am very excited to share this new recipe. I will post another recipe soon, but just could not wait to share this beauty for the holidays. I must also apologize for not posting it well before the ThanksGiving Holiday, but I just thought about making it a week ago and harvested it today.

OMG! It is so delicious.

Here were my thought in my midnight brainstorm, "How about a cranberry cultured veggie, something sort of tart, yet sweet and sour." I purchased some cranberries, cooked them in sugar and water.  Then I let them cool and refrigerated them.

The next day I prepped cabbage, onions, orange juice, ginger and spices. Then I began mixing them together until I got the flavor I wanted. The bad news is that I did not write down my exact ingredients, so take the ingredient list here with a grain of "cranberry". I will make another batch and give you the exact low-down. You can do it with these instructions though. Even if you can only let it ferment for a day or two, it will still be fantastic.

Start with two packs of fresh cranberries. Follow the directions on the package, which says to bring the cranberries to a boil with 1 cup of water and 1 cup of sugar. Cook for 10 minutes. The sugar in the cranberry mixture will help to ferment this mixture faster than regular fermented veggies where there is no extra sugar added. I had a concern that the mixture would be too sweet, but don't worry, the sugar is transformed and thus gives the finished recipe a slightly sweet, but spicy, sour flavor that has a fantastic bite from the ginger.

Ingredients:

3 cabbages with a yield of about 21 cups of fairly fine shredded cabbage

6 onions yielding about 3 cups of onions - shredded in small chunks

1 cup of peeled and shredded ginger

1 cup of fresh squeezed orange juice

1/3 cup salt

1-2 teaspoons of curry powder

3 teaspoons of cinnamon

Mix all of these ingredients together until you get the flavor you like. It should be very juicy because of the orange juice. Place the mixture in a crock, jars, or whatever you use to ferment your veggies. If you are using jars make sure you leave a little room because the juices get so excited they seem to want to ooooz out.  I took a jar of these veggies to my friend to taste today. She loved them, and called me later to tell me that she and her husband ate the whole jar on their way home.

After you harvest the mixture, refrigerate. Serve with your ThanksGiving meal and/or any meal at all.

4 Comments

Comment

Recipe of How To Eat Cultured Vegetables

What to Eat with Cultured Vegetables: Everything!!

CV-Rising Carrot

Cultured Veggies are brimming with the aliveness of enzymes and probiotic bacteria or friendly flora. This means many things for different people. Using them daily is a great way to wean your self off of sugar and/or stop sugar cravings. Using them with every meal provides a great aide to your digestion, not to mention a great flavor addition to every meal.

Many people report the disappearance of bloating while enjoying regular bowel movements just with incorporating this robust flavorful food in their daily diet. Here are some ideas for how to use them.

Soon, you will be wondering how you ever lived without them.

 First thing in the morning:

Fire up your digestion with a couple teaspoons on an empty stomach before breakfast.

Green Smoothies

Cultured Veggies are a great place to top off your green smoothie and give it an extra flavor and nutritional punch.  Use any flavor that sounds good with the blend you are making.  One to two tablespoons can turn a boring green smoothie into a vibrant robust drink.

PizzaDoughCrWSeed Ch& CultVeg

On Toast

Almost all of the flavors go great on a piece of toast. Your favorite bread can be toasted and then topped with butter and your favorite Cultured Veggie. To take it further and make a more rounded meal, add cheese to your toast, egg salad, avocado or any deli meat or tofu for a complete meal.

Eggs

Cultured Veggies are fabulous with eggs, whether you scramble, boil or sauté them. Try them in omelets or in egg salad.

Sandwiches, Burgers & Hot Dogs

Remember Cultured Veggies are like the pickle on the hamburger or the relish on the Dog. Think of using them in that way. They add an acid element that is called for in many meals to round the flavors out.  All flavors go great on sandwiches, burgers and dogs.

Add to Wraps

Wraps are another great way to bring your lunch alive.

Bone Broth & Soups

Since bone broths are gaining popularity for healing the gut and for a highly mineralized beverage, adding Cultured Veggies to them makes them even more tantalizing and healthy. Cook up healthy bones or make a veggie broth with your favorite veggies and blend of Cultured Veggies.

Pasta & Grains

Yes, they all go great with any pasta and grains. Sometimes you may not have fresh veggies around. This is a great time to use a big healing of Cultured Veggies.

TacoWMexCulVeg

Tacos

Burritos

Mexican Food

Thai Food

Curries

Yes, Everything!

Desserts

Ok, this may be a stretch for your mind to wrap around. But, since Cultured Veggies are known to alleviate sugar cravings, how about having a couple spoons full for dessert. I guarantee you may not want that sugary junk after all. It just may do the trick!

Comment

10 Comments

Beet Kvass-Fermented Beets & Cultured Foods

It seems there is no end to creativity when making fermented foods. Beet Kvass is my absolute new favorite, so delicious, refreshing and powerful. Yum Yum Yum. On Maui and most places where fresh produce is abundant, so are beets. I have found conflicting ways to make it, but all usually turn out to be good. It is also easy to make, the hardest part being to peel and cut the beets. And, it is so economical for such a powerful blood cleanser and probiotic beverage. If you want to make a smaller amount cut the below ingredients in half and use a 1/2 gallon jar. I say go for a gallon.

Ingredients:

3 large beets - peeled and cut into small 1/2 inch pieces

2 tsp salt

1/2 cup whey, or cultured veggie juice, or kefir starter to activate the probiotic action

1 wide mouth gallon jar preferably with a plastic lid

Directions:

Wash, peel and cut the beets into 1/2 pieces. Place at the bottom of the gallon jar. Put in the whey or cultured veggie juice,  salt and fill with fresh filtered or spring water. If you are going to use a Kefir Culture Starter then I recommend whisking it in a cup or so of water before you add it to the rest of the mixture insuring that it is blended thoroughly. Cover and let sit in a dark place for one week.

When you harvest it seven days later pour liquid, which should be dark red now, through a strainer and store in glass jars to enjoy. Refrigerate.  Keep the beets in the gallon jar and fill again with water adding about 1/2 cup of the fermented beet juice to the water. Cover and place in dark space for another week. Now you will have another batch in a week. You can do this one more time. Then the beets can either be discarded or eaten. I go for eating. Eat them raw just as they are, in a salad or roast them.

You will need to start over with fresh beets after you have made 3 rounds. You can also add some ginger or other herbs for flavoring if you like. Yum!


10 Comments

2 Comments

Powerful Cultured Veggies-A TED Talk on Bacteria

Want to learn more about bacteria? Get ready for a ride with this TED talk with Bonnie Bassler. Listen carefully and you will come to realize just how important good bacteria are to put in your body. It is all about out-numbering the bad guys. Profound TED talk. Listen up. Listen twice, maybe three times. See this "living" sauerkraut, or cultured veggies so alive that it is moving and ooozzzing out of the jar. This is one way to feed your gut some good guys! It is affordable and tastes good too. Learn how on my DVD "Cultured Veggies & Kefir Kitchen".

2 Comments

Comment

Cultured Veggies, Coconut Kefir and Sea Veggie Mineral Mixture

Now we're talkin! Here is Irene's beautiful collection of cultured foods. She has been taking the Essential Cuisine Dietary Makeover and I think she made over her whole kitchen. Wow, everything she made is delicious. The Tumeric Tonic? As soon as I learn more I will tell you! Isn't this beautiful. Way to go Irene. I tasted most of it and, wow!

Learn to make yourself "Chef Teton's Kefir Kitchen DVD"


Here is what Irene said, "My Coconut Kefir, made from fresh coconut and drank in, of course a coconut bowl!"

Love living in Maui, so lucky are we.

Comment

3 Comments

Cultured Veggies & Kefir from Coconut Milk & Hemp Milk

Yeah for our Dietary Makeover students!! Today one of my students dropped by a coconut kefir and her cultured veggies. Oh my, they were so good. On the left is a picture! Now, here is what is extra cool. She used fresh coconut milk, which means she combined coconut water with coconut meat. She also let it ferment for 3 days, which is more time than I would have allowed. So, it is extra tart, but just delicious. Her veggies are red from the red cabbage. They are salty with a nice bite to them. In other words they have some heat. What amazed me is that they tasted great together.


Here is another student's (who lives on the mainland) picture of her coconut kefir made from pre-packed coconut milk. Here is what she says about how she made it:

"I made coconut milk kefir! This was my first try so consider this an experiment - Ingredients: So Delicious Coconut Milk (regular, contains 6g sugars per cup, source is organic dried cane syrup)and Yogourmet brand kefir starter - just followed package directions which were exactly as on the Chef Teton DVD. I blended with fresh, orgainic, locally-grown strawberries for delicious milkshake. Taste is excellent- like the coco milk with a tang to it. I was just a bit surprised that it wasn't thicker. When I have purchased prepared kefir in the past, it was creamier and thicker. Maybe I should have allowed more than 24 hours before refrigerating?" (Chef Teton, "I think that 18 to 24 hours is fine, depending on the temperature)

Here is my Kefir made from the following ingredients:

1/3 cup hemp seed granules

2 tbsp organic raw honey

1 quart of water

Blended ingredients into a milk, then added 1 package of kefir starter from Wilderness Family Naturals.

I let it sit for approximately 20 hours. You can see in the picture how the milk separated. Once I blended it, it stayed blended and tasted quite good. I am enjoying it as a light beverage in the morning or afternoon, or as a milk in a bowl of: chopped apple, banana, flax meal, coconut flakes and raisins. Yummmmmmmm.


Here you can see the hemp milk all blended up. This has been a lot of fun, and it is just beginning.

Learn how to make Kefir and Cultured Veggies on my DVD "Cultured Veggies and Kefir Kitchen".

Happy Culturing!

3 Comments

Comment

Cultured Vegetables-Dietary Makeover's 1st Assigment

The 4-week Dietary Makeover begins with making cultured veggies. In following along with the class, I am making a big batch, which I do once a month anyway. This month's recipe is going to be a bit spicy, as in hot spicy. I will harvest them on March 12th, giving them 10 days to ferment. Stay tuned for some harvest pics then. Yum! I did not use a starter with this batch as I have found that I don't need one if they can stay in the crock and ferment for about 10 days. You don’t really need a starter even if they ferment for a shorter period of time. They get a little softer over time and a little richer with flavor, which is how I like them.  Sea salt, kelp powder and a little raw sugar were added for fermentation purposes, as well as flavor. These veggies often turn out like a relish. Upon tasting them, many people say, "Oh my God, these are good, I wish I had a hot-dog". Of course "hot dogs" are not the ideal food, but if you are eating a clean version of a hot-dog or any other food for that matter, the meal will be enhanced with the aliveness of living Cultured Vegetables.  Personally, I love mine with almost everything I eat.

Cultured/Fermented Vegetables Recipe

2 large heads of cabbage

5 Maui onions

8 carrots

8 jalapeno's

1 bunch of kale

1/4 cup salt, 1/4 cup Mineral Mixture (sea veggies), and 1/4 cup raw sugar, 1/8 cup sea kelp

Clean all the veggies thoroughly. Remove outer leaves of cabbage and save them to make canopy to put over the veggies when preparing the mixture for fermentation. Remove seeds from jalapenos unless you want a lot of heat.

Process the cabbage, carrots and all other veggies in the food processor to a rather fine chop (you can chop/process as large or as fine as you like).

Mix in salt, sea veggies, kelp or any other spices you like into the mixture.

Put veggie mixture in to a clean ceramic crock, large glass bowl, large food grade plastic bucket or individual glass jars (no metal or plastic dishes)

If fermented in a crock, large bowl or bucket, cover the mixture with a canopy of cabbage leaves to protect it from the outer world. I like to make this canopy about 1/3 inch thick. Then place the plate and/or stones (if you have a crock) on the top of the canopy creating a cover and a weight in the case of the stones. If you don’t have a fermentation crock, and use a plate then you will have to use a rock or stones in addition to create some weight or pressure for the veggies. Place the rock on top of the plate.

Make sure the inside of the bowl above the canopy, plate and rock/stone is clean so as not to attract mold.

I like to pour a cup of very salty water over the entire mixture (plate, stone and all) when I am done assembling. This insures no mold to enter below.

Cover the crock with the lid, or bowl with a towel and let sit in a dark place for as long as you like (minimum four days, two weeks is yummy).

To harvest, pour off extra liquid above, then remove stones, plate and canopy. Under all this you should have some beautifully cultured vegetables to transfer to glass jars and store in your fridge to eat at your hearts content. I hope your heart wants them every day as they will aid you in your digestion and provide you with powerful probiotic natural healthy flora. In addition they will provide nourishment to the taste buds as well and finish off a meal with complete satisfaction. Read about the value here in this profound article about cultured/fermented foods.

If you are trying to quit eating sugar, Cultured Veggies are one of the best foods to put in your diet to help stop cravings.

If you want to learn to make cultured veggies by watching, please get my DVD called “Cultured Veggies and Kefir Kitchen" here. The DVD will show you exactly how to make the veggies and kefir as well.


Comment

10 Comments

Fermented Millet, Vegetables & Coconut! Wow

This is the breakfast, lunch or dinner fit for Queens and Kings! Wow! That beautiful porridge is Ogi, fermented millet. After a couple days of fermentation I warmed it and added some raisins and a little coconut oil. Then I topped it with walnuts and added some cultured veggies and coconut yogurt to make a fully fermented meal. Ahhhhhhh, this went down with such ease, and trust me. It is so tasty. Ogi is a staple food in Africa. It is known as Uji in East Africa and Ogi in parts of West Africa. Fermented cereals take grains to another level of powerful nourishment. They are particularly important as weaning foods for infants and as dietary staples for adults. I like serving it sort of thick for a full meal or as an addition to a heavier dinner.

Here is how you make Ogi:

Coarsely grind 2 cups of millet. I used my Vita Mix. A quick whirl and I had a nice coarse grind.

Soak the millet mixture in about 4 cups of water for a minimum of 24 hours. Cover with a towel so the mixture can breathe. How easy it that? The mixture can be soaked longer, up to one week. The longer it soaks the more sour the taste gets. I like to ferment a batch and begin using after the first day, and then a little at a time, each day removing and enjoying more.

Here is what it looked like as it was fermenting. I have to say that the first time I made Ogi I was a little scared to taste it. It was bubbling and had a rather unusual smell. When I removed some and put it on the stop top to warm I had to add some water as it became thick quite easily. Once I achieved my desired consistency I added some raisins. Sometimes I enjoy it with more savory flavors such as cumin, coriander and/or fennel. Salt is always good as is some butter, coconut or flax oil. Get creative with it as it is a wonderful food. The taste may acquire some getting used to. I have grown to love it! It is a fabulous food for your digestion, moving things along powerfully.

The cultured fermented vegetables you see on the plate is red because it was made with red and green cabbage combined with Maui onions. The coconut yogurt, as I call it, was made fresh coconut meat fermented with fresh coconut Kefir water. Lucky me lives in the tropics where coconuts are abundant. Coconut Kefir water and coconut yogurt meat are always in my fridge. I use Kefir starter from Wilderness Family Naturals to ferment the water. It is the best I have found. Enjoy!

10 Comments

1 Comment

Fermenting Foods - Making A Brine

IMG_0045 Just look at this beautiful celery!! There are so many ways to make fermented foods, and there are so many fermented food recipes. Then there are cultured vegetables, which is what I am becoming at master at! Well, or so I think! After considerable research I decided to try a new way to make cultured vegetables.  I am making a brine first and then fermenting the veggies in individual jars,  with a little brine added to inspire fermentation.

Last month I ran into a farmer friend and he said he made all his cultured vegetables from fresh grown celery, no cabbage. He said they were fantastic. Here on Maui it is hard to find local celery, and if you do, it looks more like the celery in the picture. It is dark green, very strong in flavor, and a bit hard to chew. You do not see it at the local farmers markets. But, I was intrigued, and kept thinking about doing some kind of culturing with celery.

IMG_0055So, the other night while up in Kula (up-country Maui), I asked my friends, who have a huge garden full of organic vegetables for their friends to pick fresh,  if they had any celery. Yep, they answered and proceeded to put a flashlight band on my head, sending me out to pick in the dark. What you see in this picture is what I picked. I brought it home, washed and juiced it to make a brine for fermenting vegetables.

Then I added the juice of 1 1/2 apples, 2 tsp. of sugar, and 1 tsp salt.  To this extraordinary mixture I added a Cultured Vegetable starter from Wilderness Family Naturals, and put the brine to be mixture in my dehydrator to warm and ferment over night. Today I removed it and refrigerated it. But, not without a taste. Well, it tasted sort of sour and sweet. You could definitely taste the fermentation of the celery juice.

My next step will be to make a big batch of veggies and place them in individual jars for fermenting. In each jar I will add a little of this celery brine starter and then let the jars sit for a couple of weeks to ferment. Stay tuned. I will keep you in on the process!! Meanwhile, if you have some extra veggies that you want to juice, how about making a delicious brine out of it for fermenting vegetables or just for drinking! Your gut will love it!


1 Comment

8 Comments

Award Winning Cultured/Fermented Vegetable Recipe

Yes, that's right. This recipe won the award for best tasting cultured (fermented) veggies at the AgFest 2011 here on Maui. I like to call them Cultured Superfoods! Recipe:

10 cups cabbage - 3 small heads chopped or grated(save outer leaves for canopy)

5 cups red cabbage - 1 head chopped or grated (save outer leaves for canopy)

6 jalapenos - cut open and clean out seeds, then chop fine

2 onions - chopped fine

3 carrots - finely grated

1 bunch kale - finely chopped

2 tbsp sea vegetables - blended to make a powder (or use dulce or kelp)

1/4 cup sugar or local honey

1/4 to 1/3 cup sea salt for veggies

1/8 cup sea salt for salty brine to top

1/2 to 3/4 cup sprint or filtered water for brine

Use a Cuizinart or food processor to chop/grate all ingredients, except sugar, honey and salt.

Mix all ingredients together (except salt water mixture for brine) in a glass bowl or pickling crock. Cover with large leaves of cabbage to create a canopy cover to protect the foods being pickled.

Place a plate on the top of the canopy - one large enough to cover as much as the surface of the canopy as possible. Place rock on top of the plate to create some pressure on top of the vegetable mix and canopy. Do not use a rock so heavy that it pushes too much of the liquid juice of the vegetables over the top of the plate. Use a rock that gives medium pressure to the mixture and that forces some liquid juice from the vegetables over the top after a bit of time.

A good way to tell if the pressure is enough is to check on the mixture 8 to 12 hours later to determine how much liquid is being forced up above the plate. Some liquid should come up, but not too much. When this is determined it is a good time to mix the salty brine (last two ingredients above) and pour over the top of the plate. This salty brine will insure that no bacteria or mold will get into the mixture. It is your protection.

Cover bowl of veggies, plate, rocks and all with a clean cloth and place in a dark closet or corner of the room and let sit for a minimum of four days. Seven days is best, and it is fine to let it sit for 10 to 14 days. The vegetables will soften over time, create more probiotic bacteria (friendly flora) and enhance flavors.

You can also use a crock made for fermenting vegetables. The porcelain crocks come with stones for weight and air tight lids. Vegetable starters can also be used to stimulate fermentation process and enhance friendly flora.

Remember, all cultures where people live to be a healthy 100 years old have a naturally fermenting food in their daily diet. Using our precious organic veggies is a great way to make Cultured Superfoods, taking the idea of KimChee and Sauerkraut a lot further. What a great new way to get a variety of superfoods into your daily diet. They will aide in digestion and are the perfect compliment to every meal. You can make them spicy or flavor with many herbs.

Harvest by removing the canopy and discarding it. Keep all the valuable juice. Place fermented veggies in glass jars and refrigerate. They will last for months in the fridge!

Note: Vegetable mixture will certainly take on an interesting aroma. They may foam up a bit and even attract a little mold on the side of the bowl over time. Do not worry unless mold gets into the mixture. Smelly and foamy is a good sign. Experiment and feel free to give me a call or email me with your questions: Enjoy!


8 Comments

Comment

Review's From Those Eating Cultured Veggies

Hi Susan,

Since I began these few additions, I noticed @ first I didn't care for the cultured veggies, now I like them.  I almost crave more of them once I begin eating them.  I just brushed and flossed my teeth with no blood when I flossed!  This is amazing.  Also, my stool this morning was a dark, dark color, like nothing I have seen in a long time. I feel great: more energetic at night and more balanced and energized during the day. Thank you, Susan!  (Kathy, from Santa Monica, CA)
When Chef teton suggested I add cultured veggies to my diet daily, it was easy.  I like them and always have them in stock, but, I usually forget to eat them.  Once I started to add two or three tablespoons to my salad or green drinks, I noticed the benefits right away.  I became more regular and stomach got noticeably flatter.  Thank you, Chef Teton; I will definitely eat my (cultured) veggies!
Nai`a Newlight, editor
Ha`iku, HI

Hi Susan, (September 11, 2011) I woke up in the middle of the night and said to myself, "That's it - I am on the perfect diet and weight loss program from this point on" and noted the date as 9/10/11 and went back to sleep. You inspired me. I borrowed your DVDs from Rubey. I am going to copy them and then when I get some money I am going to buy the full set from you.

My gut is already smaller from the purging from your cultured vegies and fermented coconut yogurt and kefir. Such a nice feeling. I know what I weighed last Thurs so I am starting now and will adjust if ever you have time to give me some input. In the meantime I am on it. You inspired me the other night - Thanks. Love Char

Dear Susan, (September 17, 2011)

It is like I am on a cleanse but without all of the fasting and work and expensive herbs!  My stomach is almost going flat - maybe another week!  I have great stomach muscles - can do lots of sit-ups and crunches but this big tire has developed over the past 3 years since I started living in Asia.  Now it is going away while I am just eating delicious foods.

Now that I see how you make your green smoothie I think I will be able to do that too.
I am shopping today for more ingredients.  I feel so much better already.  I am really stoked!
Love,
Char

Comment

3 Comments

Cultured Coconut Kefir & Yogurt

Aug 4, 2011

First comes the fresh coconut which you can see above. Then comes the work. With a machete the coconut must be opened, precious coconut water drained and made into kefir. Then the meat is scraped out and made into a yogurt. Now, this is no easy task, but so worth the effort. I use young and old coconut alike as I like a mixture of meat. I simply blend the meat with a little coconut water until creamy and smooth and then add about a 1/4 cup of coconut water kefir that has already been fermented. Place in a jar like in the picture and let ferment about 24 hours. Only fill the jar about half way because the mixture will expand, sometimes more than others. Oh my God!!! That's all I can say! It is so delicious. If you try this at home, make sure you use a kefir starter for the beverage (coconut water). Then when that is fermented after an overnight sleep, you will have the liquid to make the coconut yogurt. Store in fridge. It lasts for weeks.

Jul 28, 2011

Here is my favorite meal to have with the coconut yogurt. Place the coconut yogurt in the bowl first, then cover with an organic apple of choice chopped into bite sized pieces. I love Pink Ladies. Sprinkle on a few raisins and some dried coconut pieces. Then I top with my favorite herbs. In a grinder I have equal parts of fennel, coriander, and cumin. I grind them on top of practically everything I eat, simply because I love them. This meal is my favorite breakfast. Yum Yum Yum!

3 Comments