Comment

Onions & Garlic for Winter Immune Power

This discovery came to me a few years ago when I had a bad cold. I researched what foods might be best for my healing, and onions and garlic came up. The way that I was taught to make them was to simply boil them in some water and store them in a glass jar in the refrigerator.

The idea was to have a couple tablespoons a day, or even twice today to build immunity, and scare away colds and flu. So, like a good girl, I made a batch. I think I did this several times for a couple years, but what happened is that they ended up sitting in the fridge without being eaten. Well a lot of good that will do me.

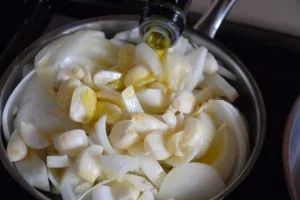
Then one day I threw some rough chopped onions and garlic cloves into a pan. I added a little bit of coconut oil, a splash of olive oil and a dash of salt. I turned on the burner very low and let them simmer until they were soft and succulent. OMG, I could hardly contain myself from eating the entire pan. They were so good this way.

This practice of cooking vegetables slow, with just the right herbs and fats can be the difference between the food sitting on your plate or digesting in your tummy where it can nourish you. This is what I learned when I discovered the Ayurvedic methods of cooking vegetables. So many people ask me what to do with vegetables. This is why I learned these methods and why I created an online course so that you can learn these easy methods that I promise will thrill you. Seriously, they are thrilling to watch cook, awakening to smell and delicious to taste.  The best part, they are just so simple.

Now you can learn these simple techniques in my new on line course called "Healing Foods - Ayurvedic". Check it out HERE. For a limited time, enjoy 10% off of our introductory offer.
Comment

2 Comments

Dr. Shade Speaks on the Power of Cultured Vegetables!

Dr. Christopher Shade spoke at the Body & Soil Conference here on Maui in the summer of 2013. He delivered 3 riveting lectures about the miraculous effects of detoxing heavy metals, particularly mercury, from the body. What was so powerful to me was the profound healing people experienced when ridding themselves of these troublesome metals. Mercury creates havoc in the body that is often undiagnosed, or diagnosed mistakenly as something else. His stories of transformation were miraculous to say the least.

During the conference I launched my Cultured SuperFoods line of cultured veggies. I also made Beet Kvass for the attendees. Dr. Shade was my best customer. At the end of the conference he held up my products and said that everyone should be buying cases of these foods.

Learn to make your own now with my new course "Cultured Veggies & Other Fermented Foods"

If you think you have heavy metals and mercury in your body (which you probably do if you have had dental amalgams or love tuna), I highly recommend that you put cruciferous veggies in your life. Even better use cabbage, cauliflower and other superfoods to create cultured veggies full of living enzymes and probiotic bacteria.

Now you can make your own veggies, Beet Kvass and other probiotic rich foods, with my course "How to Make Cultured SuperFoods". These foods are easy to make, affordable and a delicious way to obtain such powerful nutrients. Check out more info and promo clips HERE.

You can contact Dr. Shade at: Quick Silver Scientific on the web. His detox method is simple, affordable and effective.

2 Comments

2 Comments

Cultured/Fermented Veggies - A Mess Worth Making

Every time you see a cooking show, it looks perfect, right? My kitchen never looks that perfect. As a matter of fact, when I make cultured veggies, we make the hugest mess ever. There are bits of veggies everywhere and every bowl, strainer, measuring cup, knife, cutting board is used, particularly if we are using many different varieties of veggies.

So, I recommend getting the kitchen ready for the production. Here are a few tips to get you started on your own journey of messing up your kitchen royally!

1. Clear your counter tops of any unnecessary items to create plenty of counter space.

2. Clean counter tops with hot soapy water and/or some sort of natural disinfectant (I sometimes use rubbing alcohol) to make sure that everything is sparkly clean and sanitized.

3. Assemble equipment: cutting boards, knives, food processor, grater, bowls, strainers, measuring cups, gloves and fermentation jars, bowls or crocks.

4. Wash all the veggies and put them into strainers to drain.

5. Set up a station for the production flow of cutting boards, food processor and bowls to receive the processed veggies.

6. Creating a flowing order helps to maximize ease and efficiency.

7. Here is what my flow looks like: After washing I cut my veggies into about 1-2 inch chunks as they process more easily that way. Once processed, I place each variety into its own bowl. Then I measure them as I add them to my large bowl to mix them together. I write the measurements down so that I can track the batches and thus discover what veggies deliver what kind of flavor. When working with jalapenos, I wear gloves while I remove the seeds and while mixing the entire mixture together. This alleviates any burning sensation of the hands, which can be brutal for a long period of time if you handle the seeds in any way. Once the entire mixture is blended, I add the sea veggies, salt and sugar and any other spices. A strong flavor will deliver a delicious veggie mixture.

8. Place veggie mixture into your choice of fermentation container. My favorite vessel is with a very large glass container (like a crock) or food grade bucket, both with lids. I am not a huge fan of fermentation crocks. I like to see the veggies, and I am not crazy about the shape of the crocks in how they narrow at the top.  They do work great though.

9. If you are using glass then make sure you cover the veggies so they are not exposed to light. You can them with a towel.

10. Once your veggies are tucked away neatly to ferment, store them somewhere fairly cool and out of the light. Let them ferment for a minimum of 3 days. My veggies sit for 10 days to 2 weeks. Yum.

11. Now you get to clean up your mess if you have not already started!

12. When you are ready to harvest the veggies, remove the canopy and store them into large jars or glass containers and refrigerate. They get better as they continue to ferment even while refrigerated.

Now, go for it! Learn to make them with my new on line course: How to Make Cultured SuperFoods - More Info Here!

Got any questions?

Leave a comment below and let us know how you are doing.

2 Comments