8 Comments

Raw Cacao Pie with Coconut Creme Wins 1st Place!

This Raw Cacao Pie with Coconut Creme won First Place in the Maui Farmer's Union dessert contest.  What a great time we all had last evening at our ThanksGiving dinner. There were 10 other dessert entries all promoting local organic foods grown on Maui, and a fabulous pot luck. Here is what I made. First, I took locally grown Macadamia nuts and ground them with some soaked dates (and date water) to make the pie crust. Add walnuts, pecan's or cashews if you like.  Press the gooey mixture into a glass pie dish. While I was making the cacao filling and chopping coconuts down off the tree, I put the crust in the dehydrator to get crispy. Later, just before loading the crust up with the Cacao Mousse, you will need to cool it by putting it into the freezer for a few minutes, or just let it cool by sitting out for a bit.

Next, I made the Cacao Mousse. See Raw Cacao Mousse recipe. Refrigerate the Cacao Mousse while making the rest of the pie so it can firm up a bit. This is what the avocado and cacao powder look like after being blended in the Cuizinart. How creamy and delicious does that look? You should taste it!

OK, I realize you don't all have coconuts right out in your yard as I do, but you can usually find dried coconut, which you can blend with some honey or sugar water (to sweeten), and add some Agar Agar if needed for thickening. I used mature coconut meat for the following recipe:

Coconut Filling

2 cups          Raw Fresh Coconut Meat

¼ cup          Maui Sugar

1 tbsp          Maui Honey (sweeten to taste)

Blend until creamy.

Layer pie pan with crust with Cocoa Mousse, then Coconut Crème, then top with fresh sliced Kula Strawberries. Raspberries are divine with this recipe, but we don't have local raspberries on Maui!

Enjoy!!

8 Comments

Comment

SLOW Food: Bone Broths, Kitcheree & Fermented Foods

Many of us are turning to SLOW FOOD as opposed to quick counterpart "fast food".  As you get ready for winter and shift your kitchen around to suit your the cooler months dietary needs, think SLOW and warm food.

Foods that take hours to create the benefit you want, may just also be the most nourishing and fulfilling way to spend the winter months. Consider the following 3 dishes for yummy night and days by the fire!


Hearty Stew

1. BONE BROTHS & Hearty Stews

: SLOW is the way for these enormously healing liquid wonders. Most people don't make them, and often think of them as a stock for soups, etc. They are that, and so much more. On a holistic level, they are power healers and soothe the soul even more. They will warm you to your bones and build calcium, aide in digestion and just plain make you happy! (bone marrow, chicken, etc.). For bone marrow broths, just place the 3 or so bones, depending on the size in a large pan and cover with water. Add plenty of salt, bring to a boil and then let simmer for several hours (a minimum of 3). Drink just as it is, and store some (refrigerate or freeze)  for future stews or just a warm beverage that is extremely nourishing!

2. KITCHEREE:

What is Kitcheree, you ask?? Kitcheree is the staple of India and Ayurvedic cuisine. It is one of the most delicious ways to make a hearty meal in a crock pot or on the stove. Why is it a staple in Ayurvedic cuisine? It is healthy, hearty and easy to digest - easy on the pocket book too. You don't have to be from India to enjoy this easy to make SLOW dish made with exotic herbs, split mung beans, and white rice or Quinoa. Top with yogurt, cilantro and fresh lemon and your will sigh....ahhhh. 

See Kitcheree Recipe here

.

3. CULTURED VEGETABLES: Why not offer your digestion something wonderful. Cultured/fermented foods are the rave because they restore the intestines with healthy beneficial flora or probiotics. Those words don't sound so appealing, but when the veggies are made you will hear people singing a different song. "Oh, those are so good, I want to eat them with every meal", is what I often hear. Now here is the SLOW part. Once blended and put into the proper crock to ferment, they take at least 4 days. Is that SLOW enough for you? I prefer mine REALLY SLOW, after two weeks.  What's great about these SLOW naturally fermenting foods is that they are one of the most powerful foods you can put into your "life and body" because they aide in digestion. In the winter that is all the more important as people are eating more heavy and processed foods, and are most likely more sedentary. They could use a little more "alive" freshness bubbling with healthy micro-organisms that accompany every meal with a wow! Take a look at a vid clip at: http://www.chefteton.com/products

You can also read an article about their power (not to mention popularity in the media today) at:

http://www.chefteton.com/cultured-foods

Comment

7 Comments

Pumpkins Seeds Roasted in Coconut Oil

The Foodie News


Welcome to Chef Teton's Foodie News. Many of you who have received the entire set of DVD's must be wondering how to make those scrumptious Toasted Pumpkin Seeds in Coconut Oil. Well, here is your chance to watch me make them. Just click the link below and watch a short video clip on how to toast these delicious seeds. People rave about how fabulous they are on top of greens along with the Golden Elixir Salad Dressing.

Roasting Pumpkin Seeds Video

Warning: Make sure you make a lot of these seeds at once, because if you happen to set them out before you serve the salad, everyone may eat them just as they are. They are that good. Make a bunch and them so you can serve them for a snack as well. Store in an air tight jar and they will keep fresh for several days.

If you would like to know more about about these valuable nutrients in Pumpkin Seeds take a look at the articles on our web-site. Just click on the articles tab and read about this luscious seed and the wonderful benefits they can bring to your life. If you want to enjoy your pumpkin seeds "raw" but slightly roasted just follow the same directions, but dehydrate instead at 115 degrees until toasty.

Check out our new Forum and Blog. Please go to: http//www.chefteton.com and click the Blog button on the home page. I have received questions about cooking with Coconut Oil, and inquiries about using Essential Cuisine dietary principles for weight loss. Please send your questions and comments so that I can help you Make Every Bite Count! Mahalo,

Chef Teton

Chef Tetons Essiential Cuisine

7 Comments

Comment

Garlic & Onions in Coconut & Olive Oil

Knowing that onions and garlic are powerful immune boosters, and also knowing that I don't eat them often enough, I decided to find a way to put them in my daily culinary regime. My motivation was to build my immune system for travels and quite possibly an intense time with family as my dear Dad passed on to heaven. I think I was successful as I felt great the entire time I was on the mainland dealing with lots of logistic changes and emotions. One day before I left I took a whole Maui Onion and a head of Garlic. I chopped the onion in big chunks and thew them in a glass sauce pan along with the garlic cloves still dressed in their skin. Then I poured some EVO (Olive Oil) over the top, sprinkled some sea salt and covered the saucepan. With the lowest heat possible the mixture simmered for about 30 minutes. My first bite led to devouring the rest of the mixture while I was still standing in front of the stove. Oh my, it tasted so good I just could not stop. I guess my body really needed it. I did not feel that great following my little binge but soon the discomfort, which was minor, passed.

This mixture is made in my kitchen on almost a daily basis. Now I make it with coconut oil too. Sometimes I use a little coconut oil and a little olive oil together. I keep it to top on steamed veggies, open faced sandwiches with cultured veggies, tofu, or raw cheese. Once I served it with a raw cheese and cracker (gluten free of course) plate when I had guests. At first a few of the guests said, "no thank you". Then a couple tried it and the "ooos and ahhhhh" inspired the rest. Eyebrows lifted with surprised delight and soon the pan was empty!! Enjoy!

Comment

Comment

How To Highly Mineralize Every Meal With Sea Veggies: Mineral Mixture!

Mineral Mixture - Sea Veggies!

Many people are striving to put valuable sea veggies in their body right now, particularly because of our need for more minerals. My favorite way is to make the Mineral Mixture out of several different varieties of sea veggies. It is so simple and the mixture will enliven all your foods and recipes with an enhanced flavor and vital minerals. A small amount can also serve as a thickener to sauces and dressings. Yum!

Sea Veggies are also easy to store. They require no refrigeration and will last for a long time.

Here is the simple recipe and method:

Sea Veggie Mineral Mixture

Purchase a variety of sea veggies, like the following:

  • Dulce

  • Alaria

  • Kelp

  • Nori

  • Laver

  • Kombu

Take a few pieces, or a handful of each of the sea vegetables you have on hand. Grind them in a high-powered blender. I prefer the Vita Mix. Keep mixing and grinding on high speed until you get a nice powdery substance that you can use to sprinkle on everything! Note: some sea veggies can be slightly damp, particularly Dulce. If yours is, put them in a dehydrator first for several minutes until they dry out. If you do not have a dehydrator then use your oven on low for about 10 to 15 minutes. The purpose is to dry them out so they will become blend easily.

Store in a glass jar in your pantry. I like to keep a small dish out of my counter. I sprinkle in on everything as a condiment. It is great to top on eggs, soups, salads, veggies, potatoes, squash, sauces and dressings. You can also add some to your drinking water, particularly when exercising or working out.

Watch how I make the Mineral Mixture on the Raw Food Series and in the entire Essential Cuisine series: Raw, Cooked and Cultured Foods.

Enjoy!

Chef Teton

Comment

1 Comment

Fermenting Foods - Making A Brine

IMG_0045 Just look at this beautiful celery!! There are so many ways to make fermented foods, and there are so many fermented food recipes. Then there are cultured vegetables, which is what I am becoming at master at! Well, or so I think! After considerable research I decided to try a new way to make cultured vegetables.  I am making a brine first and then fermenting the veggies in individual jars,  with a little brine added to inspire fermentation.

Last month I ran into a farmer friend and he said he made all his cultured vegetables from fresh grown celery, no cabbage. He said they were fantastic. Here on Maui it is hard to find local celery, and if you do, it looks more like the celery in the picture. It is dark green, very strong in flavor, and a bit hard to chew. You do not see it at the local farmers markets. But, I was intrigued, and kept thinking about doing some kind of culturing with celery.

IMG_0055So, the other night while up in Kula (up-country Maui), I asked my friends, who have a huge garden full of organic vegetables for their friends to pick fresh,  if they had any celery. Yep, they answered and proceeded to put a flashlight band on my head, sending me out to pick in the dark. What you see in this picture is what I picked. I brought it home, washed and juiced it to make a brine for fermenting vegetables.

Then I added the juice of 1 1/2 apples, 2 tsp. of sugar, and 1 tsp salt.  To this extraordinary mixture I added a Cultured Vegetable starter from Wilderness Family Naturals, and put the brine to be mixture in my dehydrator to warm and ferment over night. Today I removed it and refrigerated it. But, not without a taste. Well, it tasted sort of sour and sweet. You could definitely taste the fermentation of the celery juice.

My next step will be to make a big batch of veggies and place them in individual jars for fermenting. In each jar I will add a little of this celery brine starter and then let the jars sit for a couple of weeks to ferment. Stay tuned. I will keep you in on the process!! Meanwhile, if you have some extra veggies that you want to juice, how about making a delicious brine out of it for fermenting vegetables or just for drinking! Your gut will love it!


1 Comment

Comment

What Do I Eat? Journal, Nov 9, 2011

Food Journal: November 9, 2011

Still trying new ways to keep myself fueled, satisfied and keeping my weight up. Ever since I did the fast last year (march 2011) keeping my weight up has been a challenge. I know, most don't have this problem, and I certainly never have either. I seem to get busy and don't eat that much.

All this said, I am going to start journaling my every day challenges, successes, tips and failures. I work at my own business, which means I seem like I am always working. I don't want to spend a lot of time in the kitchen either, unless it is leisurely. And, most the food I get when out is not up to my standards. It is often overly spiced (I almost called it "over medicated"....haha), over cooked and expensive. I totally get why people succumb to fast food.

Today: Since I was leaving early this morning I wanted to fill up before I left. This was not easy as I do not like to eat early in the day. Get ready, this is an odd day of eating:

Apple Cider Vinegar in a glass of fresh spring water to start my day followed by another glass of water within the hour. Then I warmed some fresh goat milk and added an herbal tonic with some whey protein powder and 1 tbsp of coconut oil added.  I actually drank this and it felt OK (new for me to mix this herbal/whey mixture with milk). Since my housemate was in the kitchen making a huge breakfast for she and her boyfriend, I wanted to stay out of the way. So, I quickly boiled some water, added a handful of oatmeal, one date and turned off the heat. I got ready, then I put the cooked oatmeal in a bowl "to go". Before I closed the lid, I added a raw egg yolk. Yes, that's right! I let it sit on top and then mixed it in the oatmeal when the oatmeal cooled a bit. I added a little raw sugar on top, just to make me feel better. Yes, this was a first.

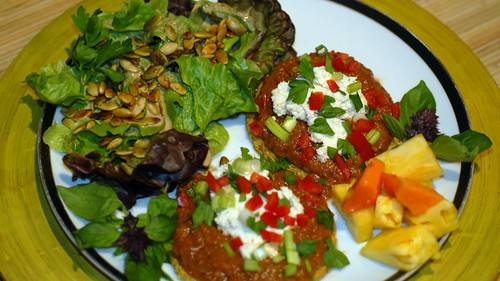
OK, this mixture was actually good and kept me feeling fueled and full until about 1:00 pm. At this time I was in Whole Foods Market on Maui (oh darn), shopping for the desserts I am making tomorrow for the 11-11-11 event. They had fresh guacamole and chips in the produce department. It was fabulous. I went back for two more huge bites. Then they had samples of scones in the bakery. I had three of those also. Satisfied, I left the store for the rest of my errands. During this time I drank my 12 oz jar of water.

When I came home I was hungry and tired, so I ate two persimmons (woohoo - in season)and then laid down for a little rest. Upon waking I decided to make a bone broth as I was craving something substantial. In the pan I threw two bone marrow bones into some water with salt and began the boil. Tonight I am going to add a potato, carrot and celery to the broth, then top with another raw egg. Guess I am into eggs today! This is actually quite a different day for me.

Oh, I forgot to say that I had my Vitality Herbs and Clay mixture in a glass of water this afternoon after my rest.(Immune Power, Mineral Mana, and Hair, Skin, Nails combo)

Bone Broth

Comment

Comment

Barlean's Lemon Swirl - Veggie Sauce

Beet Cucumber Swirl Barlean's asked me to make up some recipes for their new award winning Swirls. Swirls are fish oil and flax oil supplements appropriately named as they are made into flavorful mixtures with sweet flavors. One is a Lemon, which looks like lemon whipped cream and tastes even better. My first approach would be to make a sweet sauce to put on fresh fruit, but my roommate found the jar in my fridge and put it on her vegetables. She just loved it.....yet did not know what she was eating.

My next step was to enhance this sweet lemon flavor into a cool and refreshing sauce for veggies.

So here you have my first invention........Lemon Swirl with EVOO and some Raw Tahini......Add a little sea salt and it is the perfect simple sauce full of various flavors. Note the sea vegetable mineral mixture on the top; a dry mixture of various kinds of sea vegetables.

Comment